
 My Account
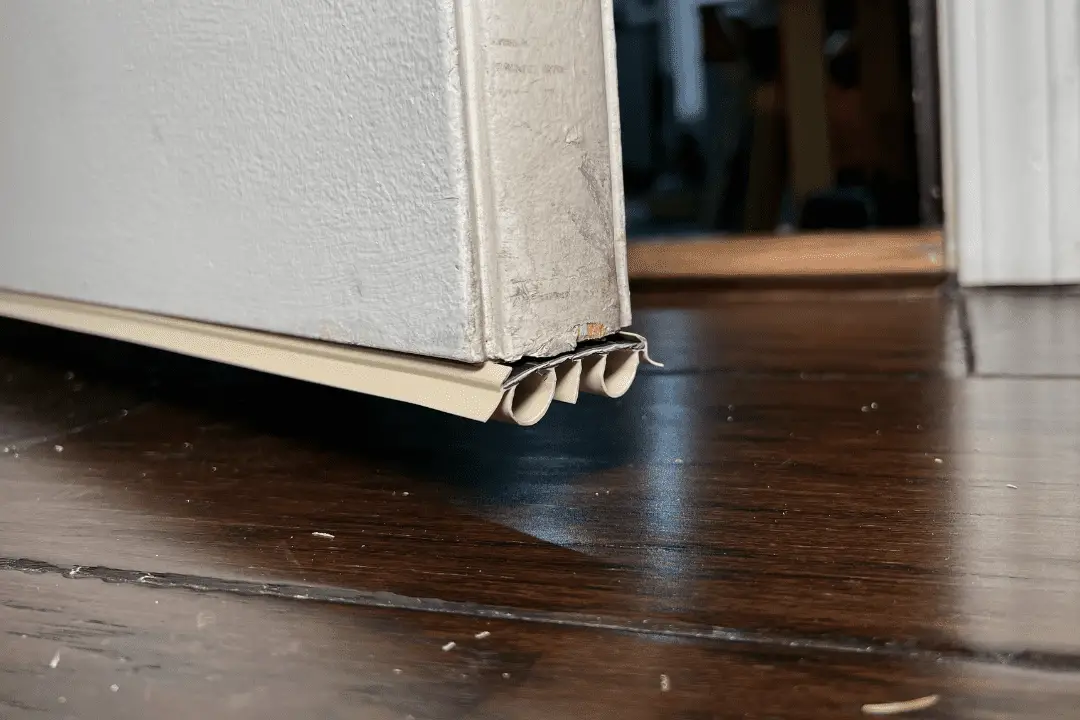
A common maintenance item in your home is your exterior doors and the weatherstripping around them. When the weatherstripping around the top and sides of a door is starting to deteriorate, it can be fairly obvious. What might not be so obvious is what’s underneath the door. A gap between the bottom of the door and the threshold can be a great way for drafts and bugs to come into the home.
You want to make sure you have a flexible, secure seal on the bottom of your exterior doors, one that keeps the outside air and bugs out without making your door hard to close. This is a simple, DIY repair that takes hardly any time at all, even if you’re new to home improvement.
Choosing and Installing Bottom Door Seals: Step-by-Step Guide
In this tutorial, I’ll show you step by step how to replace one of the most common bottom door seals. This type is installed by simply inserting it into slots called kerfs or kerf cuts.
I’ll also go through the many different types of seals available, in the event that your door is different than the one I’m using in this demo.
We’ll first look at a couple of things that are important to evaluate before starting your project. Then I’ll show you how to cut your new bottom door seal to size and install it.
Rather watch than read? Check out this 10-minute video.
DISCLAIMER: This video and description contain affiliate links, which means that if you click on one of the product links, I’ll receive a small commission.
Choosing and Installing Bottom Door Seals: Supplies and Tools
Supplies
Optional supplies and other types of bottom door seals:
- Longer #9 (2 ¼”) Hinge Screws
- Friction-Fit Bottom Door Seal
- Bottom Sweep (brush, screw-mounted)
- Bottom Sweep (flexible strip, adhesive-mounted)
Tools
- Hammer
- Heavy-duty scissors
- Pliers
- Screwdrivers
- Tape measure (if you don’t have an old seal to use as a template)
Things to Do Before Starting Your Project
To make sure we’re set up for success when we actually mount the new seal, we’re going to check the condition and placement of the threshold and also tighten all the door hinges before doing anything else.
Check the Condition of the Threshold and its Placement
We want to make sure the threshold is solid and at the right level because that’s what the bottom door seal is going to press against in order to do its job.
So let’s assess the threshold for damage. If it feels loose or squashy when you step on it, you might have a problem with your subfloor.
Deterioration of the subfloor can happen if your door is exposed to a lot of rain. The water can seep in and cause damage. Any issues with the subfloor really need to be addressed in a timely manner, but that’s a bigger project and a topic for a separate discussion.
Assuming that your threshold is sound, the next pre-install thing to check is its adjustment. This step is to ensure that the threshold is sitting at the correct level.
Most thresholds have four Phillips-head screws that you can turn to raise or lower the placement. By turning the screws clockwise, you lower the threshold; by turning them counterclockwise, you raise it. The objective is to position the threshold so that it comes into proper contact with the bottom door seal. This adjustment alone could fix an air leakage or bug problem.
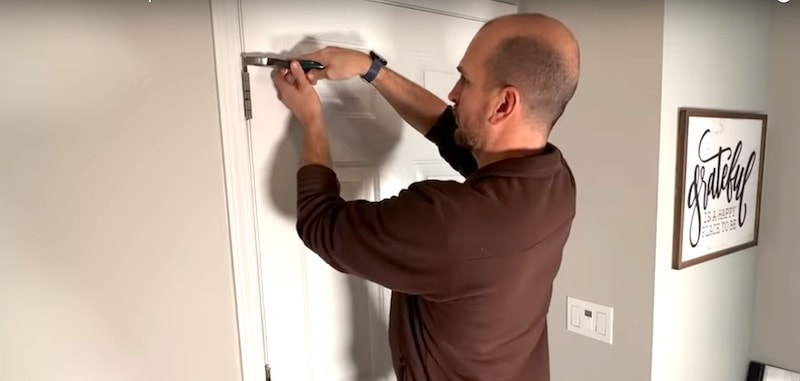
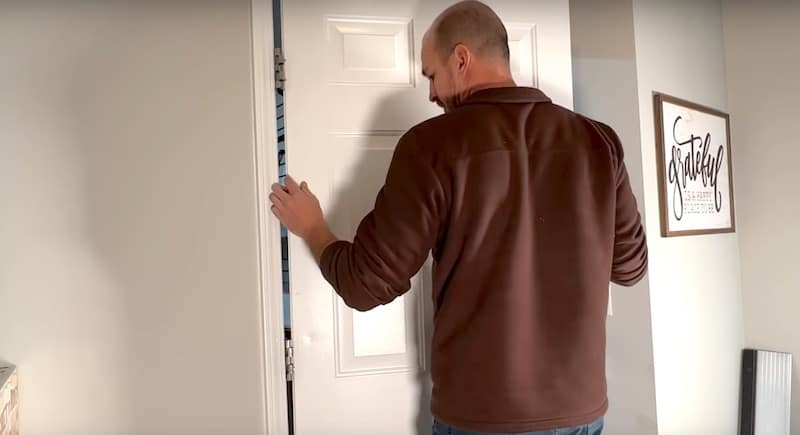
Tighten the Screws in Your Door Hinges
Now we’re going to tighten up all the screws on the door hinges. It’s very common for these to loosen up over time.
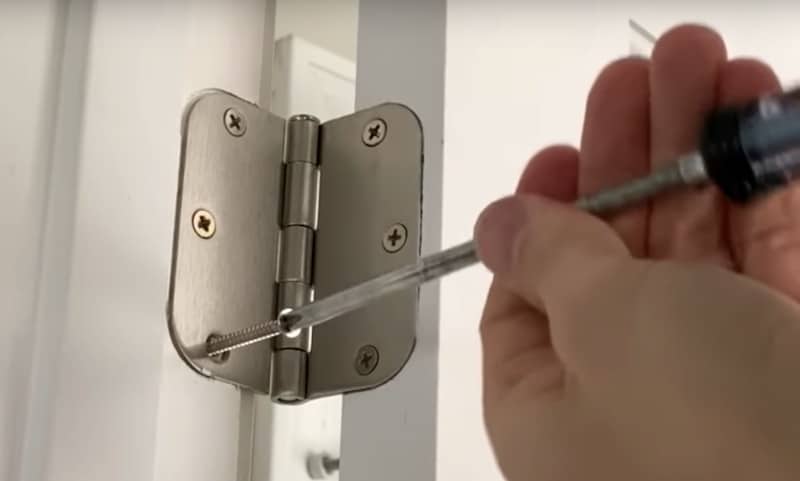
If you have 1-inch screws and they’re turning endlessly because the screw holes are stripped out, a simple fix is to put in 2-inch or 2½-inch screws. In the Supplies section, there’s a link to these longer screws, if that’s helpful.
All you have to do is sink the new screws directly into the existing holes. This is a simple thing you can do to bolster your hinge support.
Now that our hinges are tight and our threshold is properly adjusted, let’s talk about the different types of bottom door seals.
Different Types of Bottom Door Seals
Pretty much all bottom door seals come in 36-inch lengths. This is because most exterior doors are either 32 or 36 inches wide.
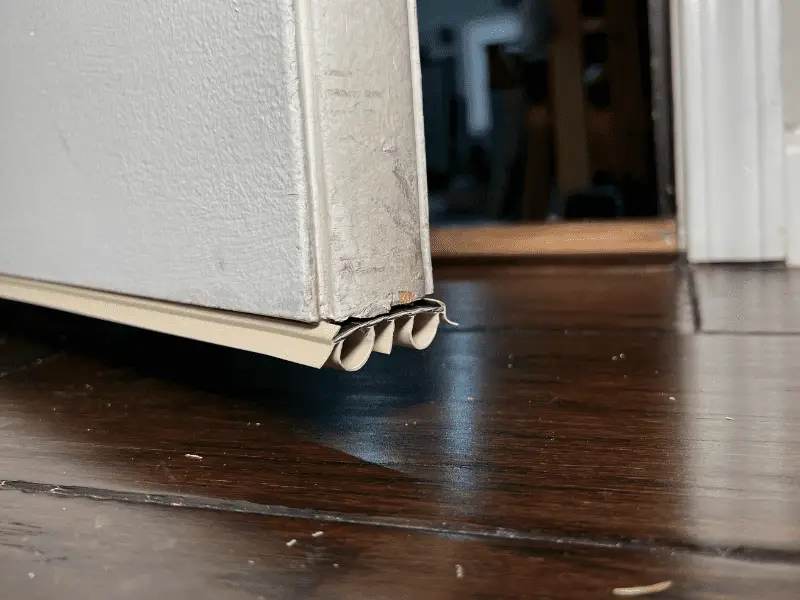
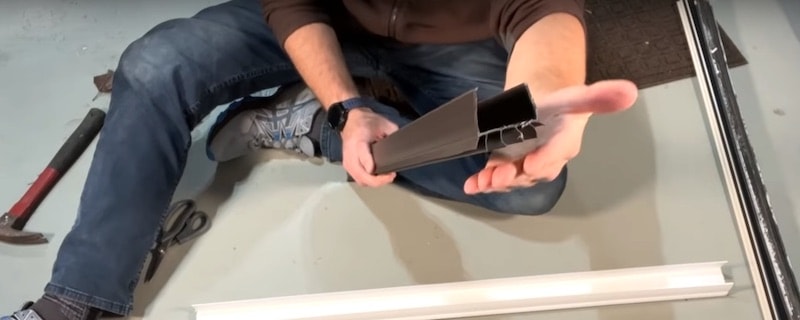
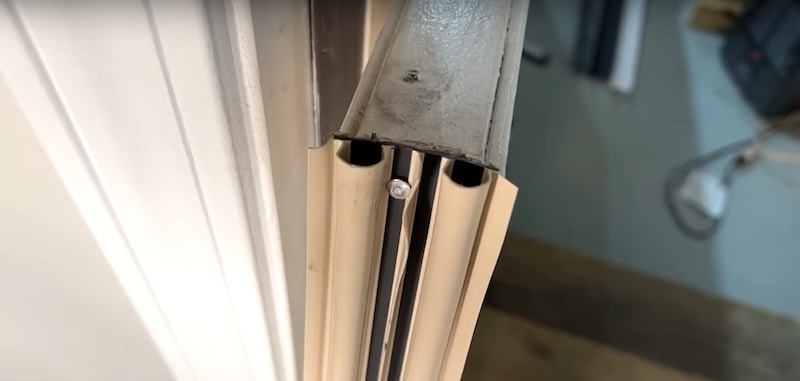
Kerf Seals
The bottom door seal I’m replacing has cylindrical seals on either side of the exterior side of the seal. When looking at the profile of the seal they look like two bubbles (in fact, you’ll see them referred to as double-bubble seals).
Between these channels are the sweeps that run the length of the central part of the seal.
Non-Kerf Seals
If you don’t have kerf cuts in the bottom of your door or if the door is in bad shape, here are your options:
- Friction-fit seals that slide onto the bottom of the door
These can also be called compression-fit, cinch, or U-shaped under-door seals.
This type of seal is basically a three-sided channel, designed to stay in place all on its own with just the compression caused by the sides of the channel.
Frankly, I’m not a fan of this type of seal for long-term use. I don’t trust the friction fit to last for years and years. It could be a good quick-fix if you just need to stop the cold air or bugs until you figure out a permanent solution.
Installation note for friction seals:
Play with the vertical adjustment of the seal so that it comes into correct contact with the threshold, then secure the positioning by drilling four holes along the inside of the door and fastening with screws.
- Door sweeps
There are two main types of bottom door sweeps:
- A brush attached to a metal strip
2. Solid but flexible strips
These types of draft-stoppers mount to the bottom of the door on the inside.

When the door is closed, the sweep should press against the threshold. If it doesn’t fit tightly to the threshold, you’re still going to have a draft or bug issue.
As far as mounting a sweep for the bottom of your door, there are a couple of main modes.
- With adhesive strips. These are convenient but aren’t the greatest long-term solution, especially in severe climates because cold weather causes the adhesive to become brittle and lose its grip.
- With mounting screws. The sweep comes with pre-cut slots that will give you some room for vertical adjustment. You’d need to drill pilot holes in your door before putting the screws in.
To cut the broom-style door sweep to size:
- Remove the brush part from the metal strip.
- Measure the width of the door.
- Cut the metal strip of the door sweep with a hacksaw, taking equal amounts off both ends so that the screws end up evenly placed and there’s a screw near each end.
Removing the Old Bottom Seal from the Door
The easiest way to swap out the bottom door seal is to remove the door.
Tap the underside of the hinge pins with a nail or small punch to push them up to the point where you can grab ahold of them with a pair of pliers.

Pull the pins all the way out of the door hinges with the pliers.
With the hinge pins out, gently pull the door away from the hinges.
To work on the door, I’ll just turn it on its side and lean it against the door jamb.
You should be able to detach the old seal by simply pulling it away from the door but you might need a putty knife or a screwdriver to help dislodge it. If it’s a kerf seal — one that affixes to the underside of the door with a fin (spline) inserted into a carved-out slot — it should come away easily. You may find, however, that you have some nails or staples that you need to pry away and remove.
Don’t throw the old seal away just yet. It’ll come in handy as a template for measuring the new seal.
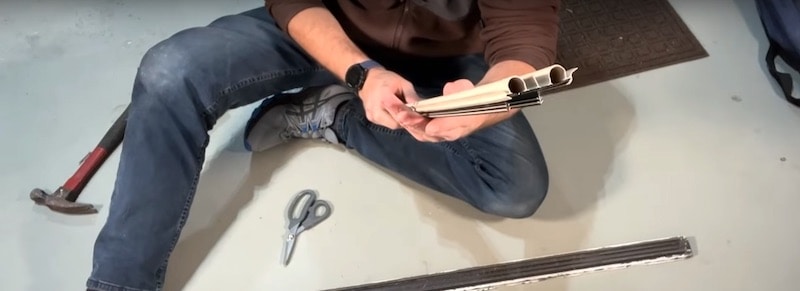
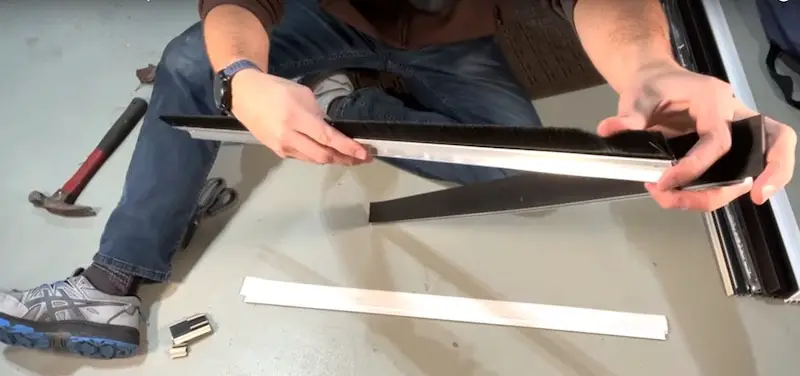
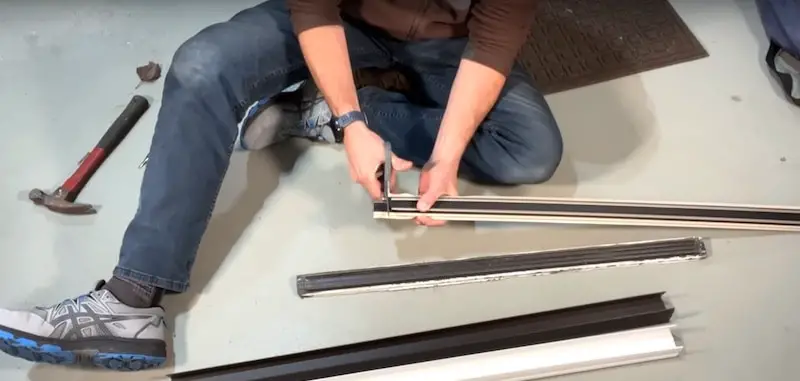
Measuring and Cutting the New Seal
As long as the old seal was properly fitted to the door, we can use it as a guide to cut the new one.
My door is 32 inches wide and the new seal is the standard 36-inch length, so I’ll need to cut it down. To do this, I’m going to remove material from both ends of the seal.
First, I’ll cut about an inch off one end using some heavy-duty scissors.
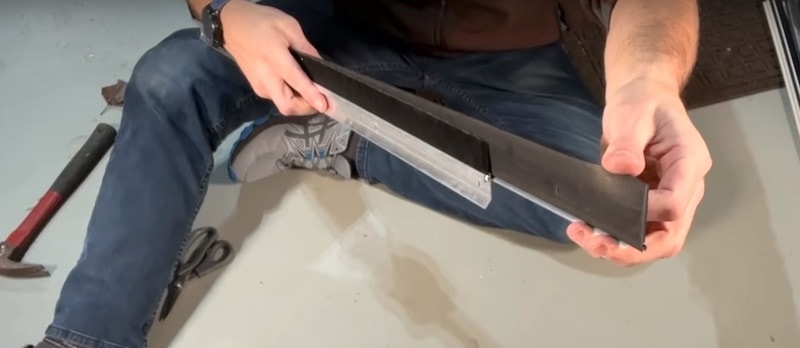
I want to leave a little space between my cut and where the splines start. (The splines are the fins running on the top side of the seal that will hold it onto the underside of the door.)
Next, line up the cut end of the new piece with one end of the old piece. Make a small snip in the new piece with your scissors to mark the spot where you’re going to cut it.
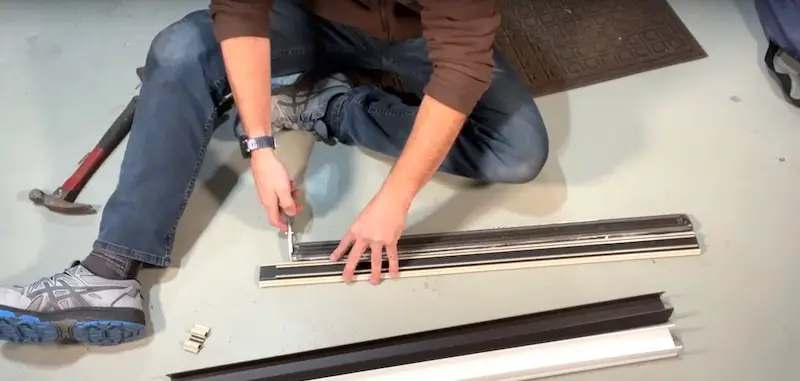
Cut clear across the new piece of weatherstripping with your heavy-duty scissors where you’ve marked it.
Finally, let’s trim back the splines a bit. We don’t want them coming all the way to the end of the seal because the kerf cuts don’t come all the way to the edge of the door. If you’re unsure about how much to cut back the splines, just look at the underside of your door.
To snip the splines back, make one horizontal cut and one vertical cut.
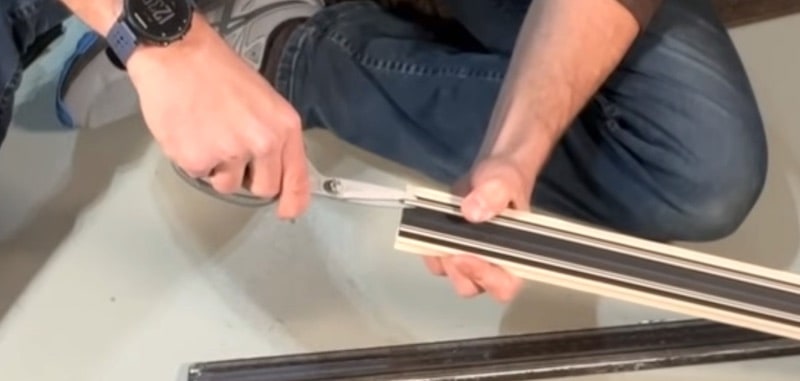
Now I have my properly sized new seal! You can see that it doesn’t take much time to do this replacement.
Mounting the New Seal
If your door’s in good shape, mounting the new bottom seal should be easy.
Line up the new seal on the underside of the door, confirming that your measurements are correct and that the splines fit the kerf slots.
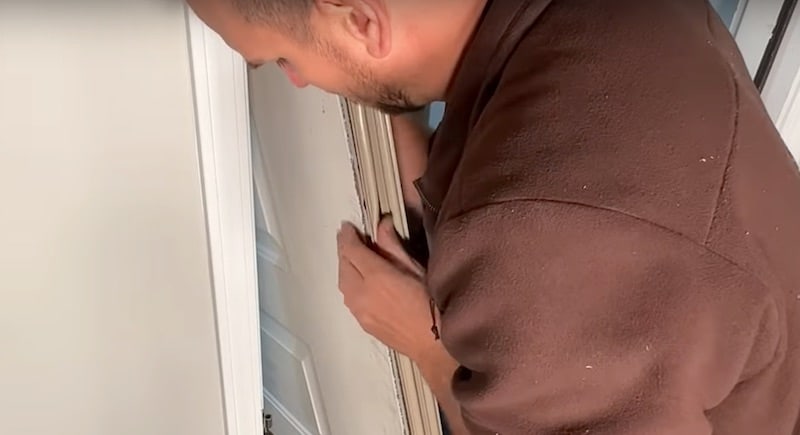
Press the splines into the kerf slots, working from one side to the other. Make sure the splines are fully seated in the kerf cuts.
Once the new seal is solidly in place, you might want to put a small nail or staple near each end of the seal as a final step. This way, you won’t have to worry about the seal coming loose for a long time. When hammering in the nail, take care not to damage the seal.
Reinstalling the Door
To reinstall the door, line up the bottom hinge first, then the middle and top hinges.
Put the middle pin into the hinge to hold it while you insert the other pins, then gently hammer the pins down.
That’s it! Your new under-door weatherstripping is installed.
Other Weatherstripping-Related Repairs
To learn how to replace the weatherstripping all around your door, check out our YouTube video and article.


