
 My Account
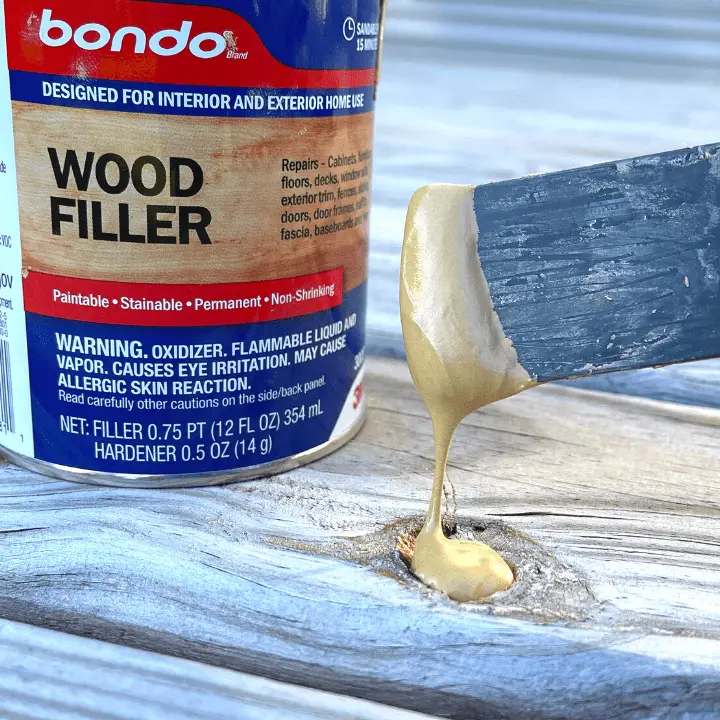
Dealing with some damage/large holes in your deck boards? Luckily, this is an easy repair project! In this blog, I’ll show you how to use Bondo Wood Filler to fix your deck boards in three simple steps. But if you’ve done this in the past, let me know your favorite wood filler in the comments!
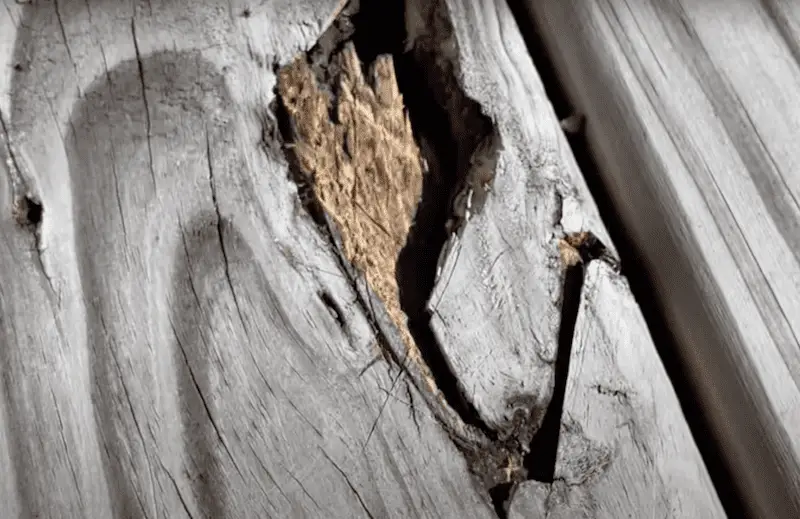
Why do deck boards get holes/damage?
For me, my deck is pretty new (only a couple of years old) and my deck boards are about 24 feet in length. They’re huge, so it’s really hard to get a good board stretching the entire length. So I wasn’t surprised to see a few pretty big knots that I needed to fill before cleaning the deck and sealing it.
Tools:
- Bondo Wood Filler (The reason I like the Bondo is that it sets up in about 15 minutes and then you can start sanding. So it doesn’t really stretch out your project.)
- Vacuum
- Sandpaper or Orbital Sander
- Putty Knife / Spreader
DISCLAIMER: This blog contains affiliate links, which means that if you click on one of the product links, I’ll receive a small commission.
Rather watch than read? Check out this 7-minute video.
3 steps – Repair your damaged deck boards
1. Prep & plan
Before you get started, make sure the weather is about 40 degrees Fahrenheit or higher. When I did this project, it was about 60 degrees Fahrenheit and sunny, which was perfect for this project.
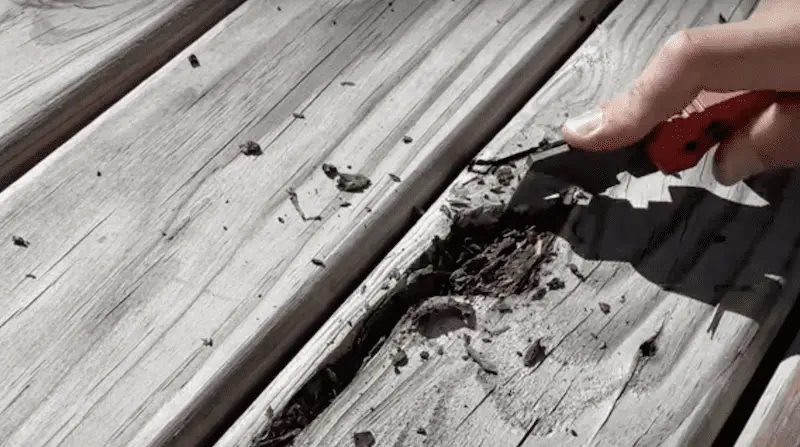
Like most projects, the success of this one leans heavily on your prep work. First, use a sharp utility knife to get rid of any loose or rotted wood.

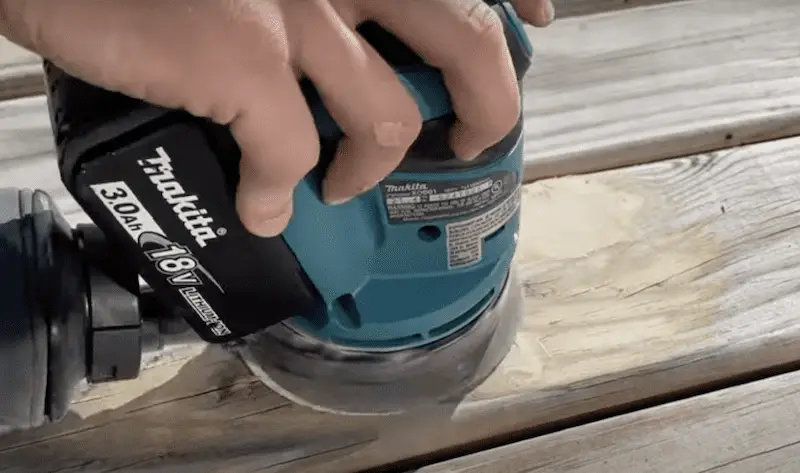
Start with one round, loosen up everything and get it to solid wood. Then, take a shop vac — like this Makita dust buster — to vacuum things up. Then perform another round of cleaning, continuing to dig a bit deeper to get some more of the rotted wood out of the bottom if needed.
At this point, take a moment to strategize your next steps. If you have multiple knotholes to fill, start off with a small batch. It’s good to get experience to find out how much of the hardening agent you’ll need and how fast it takes to set up. My recommendation is to do one coat and get everything good to go before sanding.
2. Mix & start filling
Once you have a plan, start mixing the Bondo a little bit and add the hardening agent with a spreader. If you don’t have a spreader, a 1.5-2” putty knife can also work well depending on the size of your knot holes.

Thoroughly mix the hardening agent but remember it’s going to start to harden (as expected), so this is your working time and something you need to be cautious of. You don’t want to take too long or rush things.
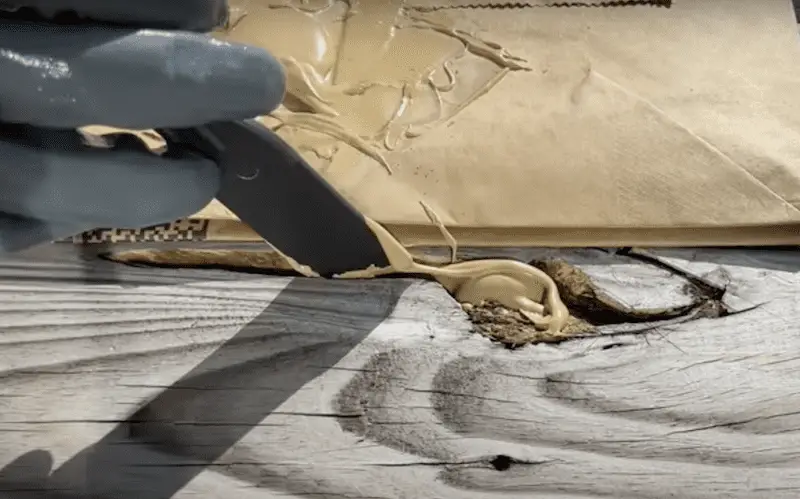
After it’s fully mixed, use a putty knife as opposed to the spreader to apply it to the knothole.
Then, try to get it deep inside especially if you have a pretty deep knothole. However, don’t go all the way through because the Bondo would likely fall out the bottom end.

Wait for it to harden up. You’ll know it’s hardening when it’s not as easy to spread. And push the Bondo into the knothole to make sure you can get as much coverage as possible.
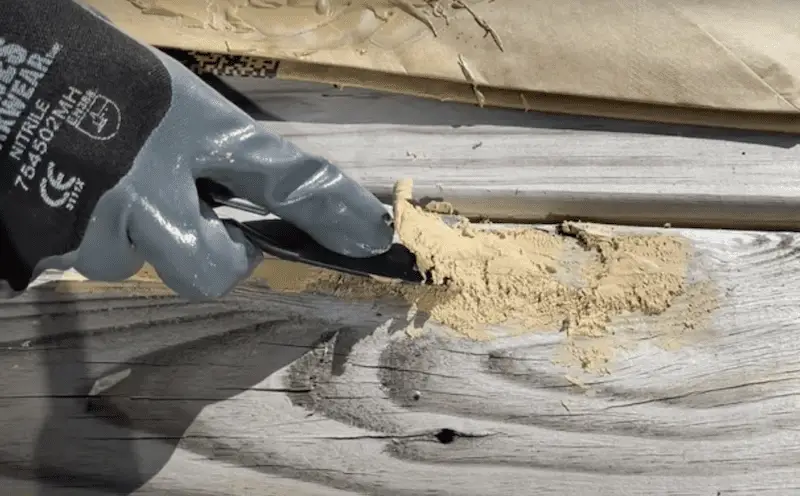
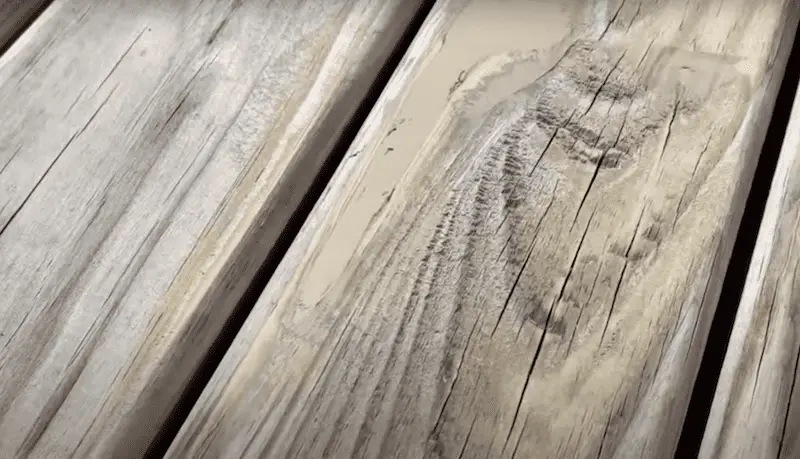
After it sets, scrape off the extra right away because that’s going to lessen once it actually sets up (after 15 or 20 minutes). This will reduce the amount of sanding you need to do, which will save you time especially if you’re manually sanding.
I used 80 grit sandpaper, but an orbital sander would make it much quicker and easier.
3. Repeat & refine
At this point, I wasn’t completely satisfied with the overall finish. While it doesn’t need to be perfect, I did a second coat and repeated the process to fill in spots that I missed the first time.
The wrap up
Overall, I’m happy with this project and think the wood filler gives the deck a more polished and finished look. Plus, it’s less likely you will get a large sliver in your bare foot, Ouch!
Here are some notes that I picked up along the way that will hopefully make your project easier:
- I was caught off guard by how fast this hardening agent sets up. so depending on how much you use, it could start to harden in as little as 60 to 120 seconds. That doesn’t provide a lot of working time so make small batches.
- As mentioned, I did two passes to get it to where I wanted it to be. But, hopefully you’ll get it done in one for all your different knots.
- I wasn’t aiming for perfection since this is an outdoor deck, so I only used 80 grit sandpaper.
- If your knots are on the edge of the board, use a little duct tape. This will contour to the curve of the board. Then, double back over the hole with the back of duct tape, so the Bondo doesn’t try to stick and you can easily remove the tape. This will help your Bondo be contoured to the edge of the board.


