
 My Account
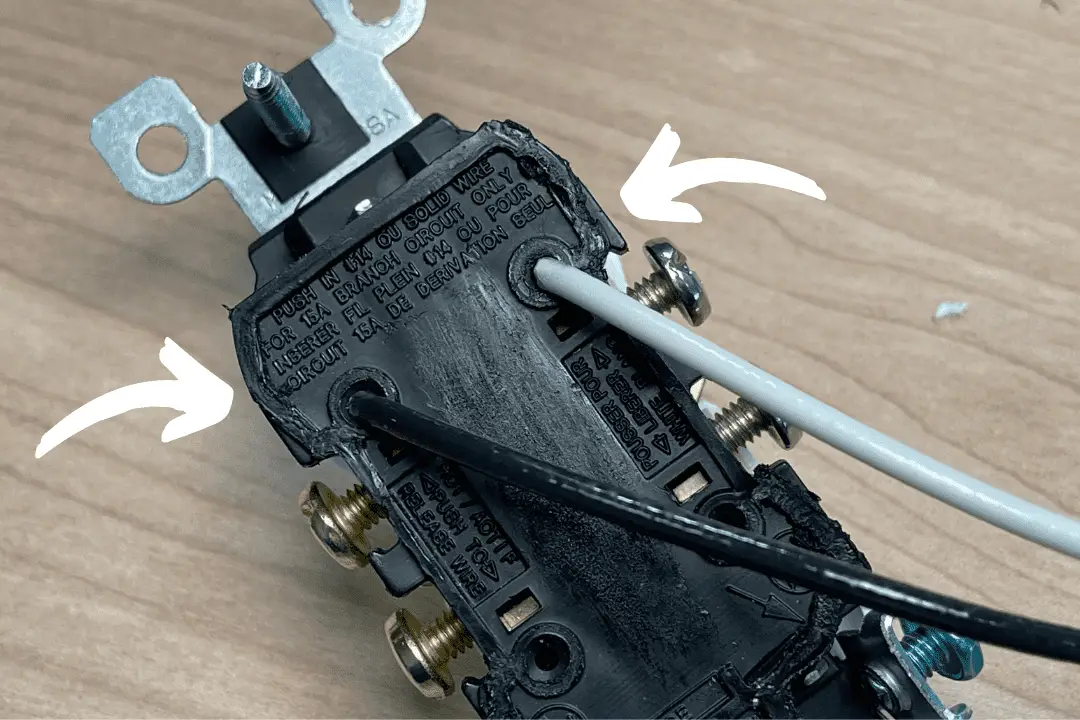
Today we’re going to talk about two ways to wire a receptacle — speed wiring vs. back wiring — and why I think you should not use speed wiring when installing an outlet in your home.
In spite of the fact that speed wiring gets a lot of push-back from professionals, it is extremely common in newly built homes. If your home was built in the last 10-15 years, your outlets have most likely been wired using this technique.
Speed wiring goes by many other names: stabbing, backstabbing, push-in, push-pin, and quick wire (which is also a trademark by Leviton).
Back wiring (not to be confused with backstabbing) may seem very similar to speed wiring in terms of getting the wire installed in the receptacle but the differences are pretty significant with regard to the security of the connections you get within the outlet and the resulting safety in your home.
Note: Back wiring is often a feature found on the commercial-grade outlets which is a bit more expensive as compared to residential-grade outlets.
Speed Wiring vs. Back Wiring: A Concise Comparison
In this article about speed wiring vs. back wiring in a residential setting, we’ll discuss:
- What is speed wiring
- Why is speed wiring so common
- What is back wiring
- Why back wiring is preferable
- What is side wiring
- What are the challenges to side wiring
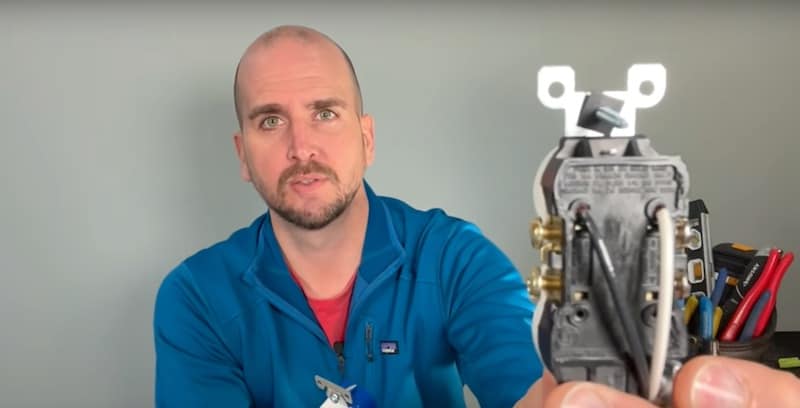
I’ll be talking very specifically about the technical difference between back wiring and speed wiring. If you’re new to electrical work, don’t worry, we won’t be using sophisticated terminology or anything like that. I’m simply going to take apart a receptacle so that you can literally see what I’m talking about.
We’ll take some simple measurements of the contact points inside the receptacles for both wiring methods and then do a comparison.
Once you see the differences in the electrical connections that can be made within the outlet, you’ll understand why I recommend back wiring as the best approach for do-it-yourself electrical projects around the house.
Rather watch than read? Check out this 10-minute video.
DISCLAIMER: This video and description contain affiliate links, which means that if you click on one of the product links, I’ll receive a small commission.
Speed Wiring vs. Back Wiring: Supplies and Tools
Supplies
Tools
What is Speed Wiring?
The Speed Wiring (Residential-Grade) Receptacle
Speed wiring is not unique to any brand of an electrical product. Pretty much all manufacturers of electrical components offer speed wiring receptacles and switches. These residential-grade items are at the lowest end of the quality spectrum.
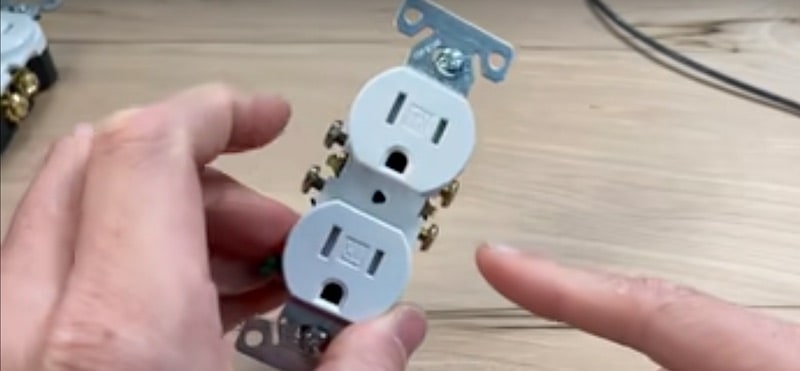
Let’s take a look at two examples of speed wiring receptacles.
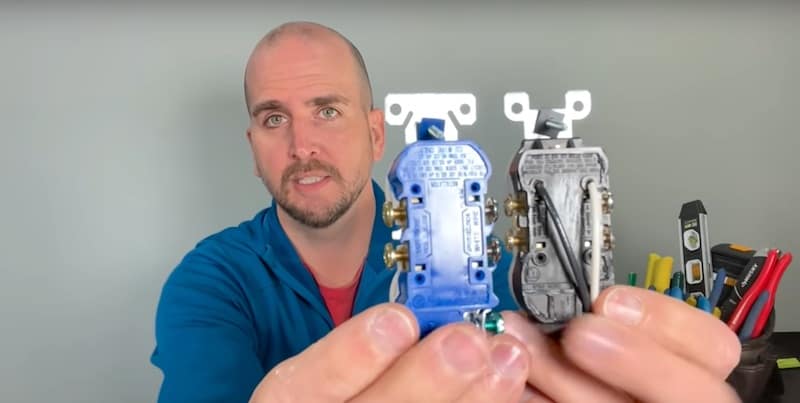
On the right is a Leviton non-tamper-resistant, very low-end receptacle that costs 50 cents and on the left is an Eaton tamper-resistant receptacle that costs $1. The Eaton receptacle is also on the lowest end in terms of quality; it costs more than the Leviton because of the tamper-resistant feature.
On the back of the receptacle, there is a strip gauge that shows you how much insulation to strip off the wire to use the backstabbing feature.
How Contact is Made Inside the Receptacle with Speed Wiring
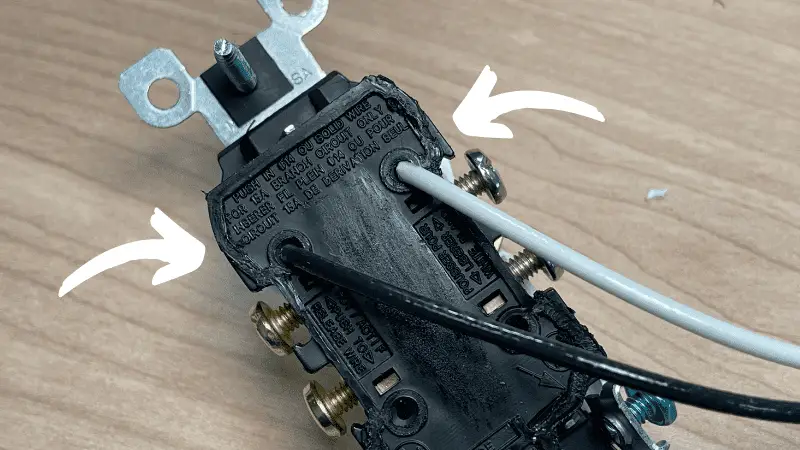
I’ve wired the Leviton residential-grade receptacle with two 14-gauge solid-core wires, one on the hot side (black wire) and one on the neutral side (white wire).
Let’s pop the cover off the housing to open up the receptacle so we can see how contact is made between the wire and the terminal with speed wiring.
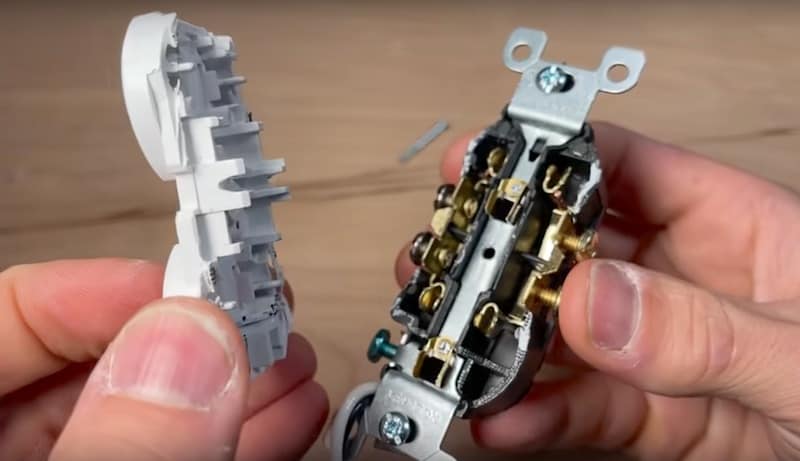
In the upper part of the housing, you can see the 14-gauge wires on both sides and how they make a connection with the internal part of the receptacle.
When you insert a wire in a speed wiring receptacle, it gets wedged between a retaining clip and an edge that pushes the wire up against the actual contact to make your connection.
Let’s take even a closer look at the interior of the receptacle to see how much surface area of the wire we have on the contact.
I’ve removed the contact from the receptacle and cut the wire to get up close to the detail.
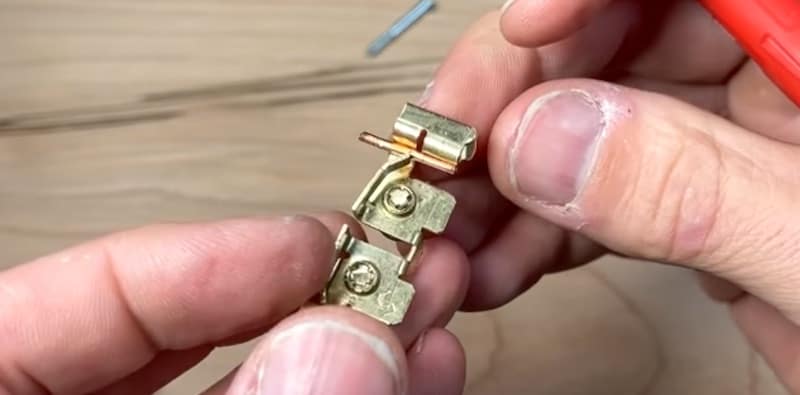
You can see the retaining clip that’s holding the wire in place.
Measuring the Contact Area Inside the Speed Wiring Receptacle
Turning the contact over, you can see the area where the wire actually makes contact, which lies between my Sharpie marks.
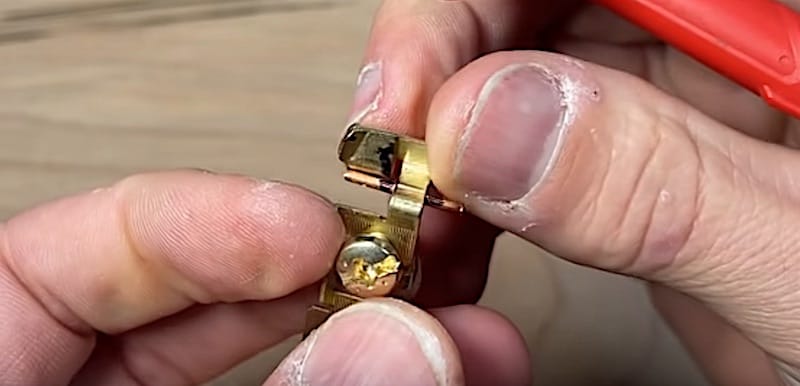
Marking the wire will also enable me to measure the actual contact area for our ultimate comparison between speed wiring and back wiring.
Issues with Speed Wiring
Now let’s talk about where some of the issues lie with these speed wiring or “backstabbing” receptacles.
If the wire was bent when it was pushed in, or if it’s been rotated or worked from the outside, it can start to reduce the amount of contact you have.
Many professional electricians don’t like backstabbing because they’ve seen it too often as the source of fried wiring and electrical fires, citing the limited point of contact and retaining clip as the source of the failures.
Under the YouTube video, you’ll find lots of awesome comments on this topic, including many from pros, if you want to deepen your understanding of the issues and dangers of speed wiring.
Why is Speed Wiring So Common?
If electricians aren’t crazy about speed wiring, why is it so common in the industry?
Now, this is just my opinion, but the reason speed wiring is so common is right there in the name: speed.
Contractors and home builders want to bring down their material and labor costs. These residential-grade outlets mean cheaper parts that still meet code but save on labor. Let’s face it: commercial home builders want to maximize their profit, so speed wiring makes sense in the context of mass production.
But for your home, I think there’s a better way.
Back Wiring: A Better Option
As a do-it-yourselfer, you probably want to do things with a little more quality and little more safety. If you’re comfortable with electrical work, I think it’s a good idea to upgrade from the cheapest residential receptacles to commercial-grade receptacles, and to use a wiring method called back wiring. It isn’t that much more difficult than speed wiring.
Let’s take a look at the differences.
The Back Wiring (Spec/Commercial-Grade) Receptacle
For the back wiring demo, I’ll be working with an Eaton spec-grade receptacle. Spec grade falls in between residential/cheap grade and industrial grade. It is also called commercial grade.
On the back of this spec-grade receptacle, there is a strip gauge, which is basically a slot that shows you how far back to strip your wire.
How Contact is Made Inside the Receptacle with Back Wiring
Inside the spec-grade receptacle, there are plates that clamp down on the wire when the screw is tightened. Screw terminals make for tight connections, and that’s what we want when it comes to anything electrical.
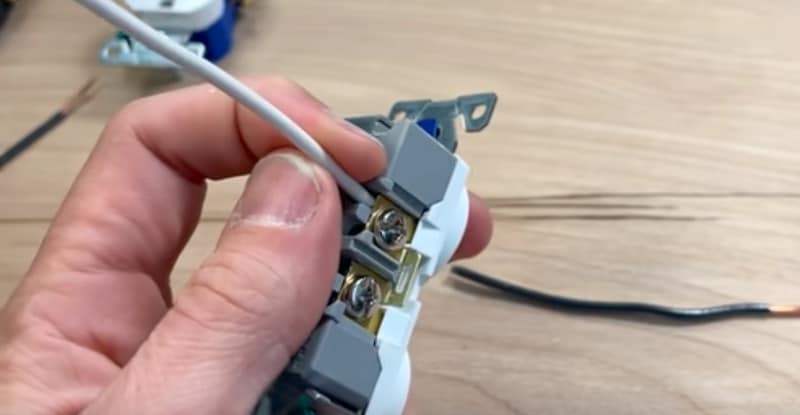
We also want to tighten down any unused terminals. A loose terminal can be dangerous. With a spec-grade receptacle, you can do this.

Comparing the Speed Wiring Terminals with the Back Wiring Terminals
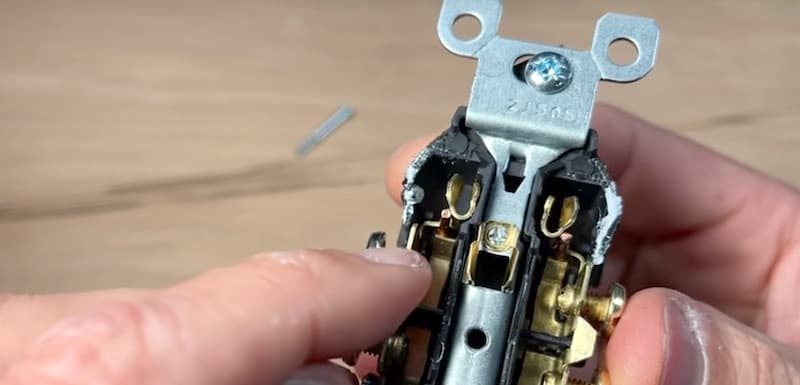
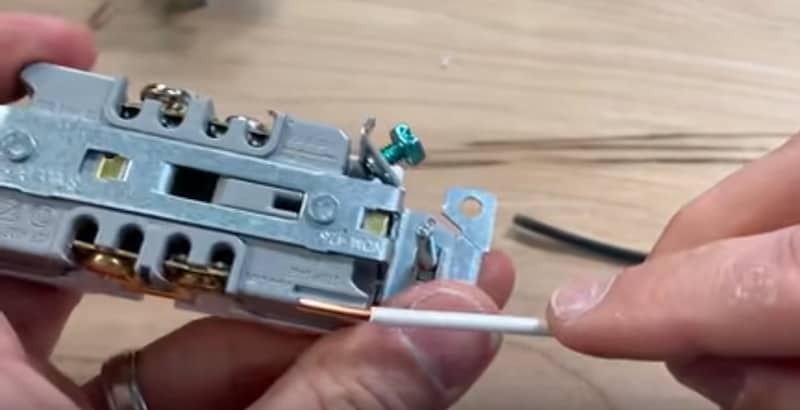
Let’s go back to our speed wiring receptacle to draw a little comparison with regard to the terminals. In the residential-grade receptacle, the terminals are enclosed in the casing; you’re not going to be touching them.
With the casing off, you can see how far the terminals in the residential-grade receptacle are hanging out.
This is not desirable. If you have a metal electrical box, your hot side could make contact with the side of the box.
Back Wiring Technique
Back wiring is a very simple technique, even for a new do-it-yourselfer.
Before inserting the wire into your spec-grade receptacle, make sure the plate is pushed in. Then Insert the wire and tighten down the terminal.

That’s it. It takes a little longer to wire up the receptacle this way, but not much. The time it takes to tighten a screw is basically the only difference.
From the surface area perspective, however, you’re getting two sides of contact for the full length of that copper strand.
Speed Wiring vs. Back Wiring: Contact Comparison
Now for our comparison of contact within the speed wiring and back wiring receptacles.
The little copper strand on the bottom is the portion of wire from the speed wiring (residential-grade) receptacle that I marked with my Sharpie, cut down to the piece that is actually making contact.
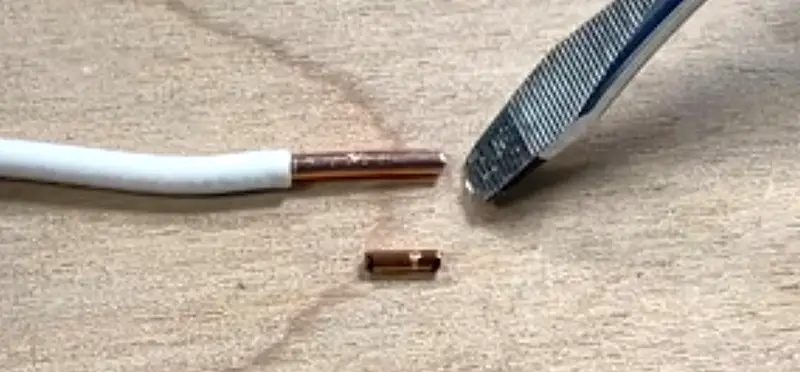
It’s about 6mm or ¼-inch long.
Above it is the wire from my back wiring (spec/commercial-grade) receptacle. The copper section of contact is about 12mm or ½-inch long — twice that of my speed wiring strand.
But the length of the strand isn’t the only thing that factors into the contact.
Don’t forget that speed wiring connects with only one side of the wire making contact. With back wiring, the wire is clamped on two sides for the whole length of copper. I would argue that you’re getting about 4 times the contact surface with back wiring compared to speed wiring. That’s pretty significant.
A Brief Look at Side Wiring: What It Is and The Challenges
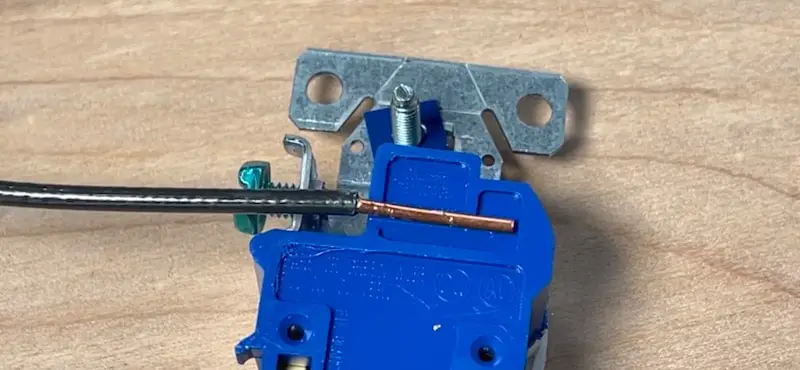
I do want to touch on side wiring briefly. This method has been around forever and it works great but it does require some skill.
For side wiring, we’re literally working on the side of the receptacle, putting a J-hook of wire around the terminal in a clockwise direction, and tightening it down.
Common mistakes and challenges for DIYers with side wiring are putting the hook in the wrong direction and not getting the hook tight enough, so that when you screw down the terminal the hold isn’t very good and the wire isn’t making proper contact.
There is more opportunity for error with side wiring, and this is another reason I favor back wiring for do-it-yourselfers.
Speed Wiring vs. Back Wiring: Conclusion
I hope now the differences between speed wiring and back wiring are clear! With roughly 4 times the contact surface, back wiring makes for a much safer electrical situation, which is why I think it’s a better approach for DIYers.
More Receptacle-Related Info
For a related article on electrical outlets, have a look at 10 Things You Didn’t Know About Receptacles.
To watch a receptacle-related video, check out What Outlet Should You Buy For Your Home | Commercial vs Residential.


